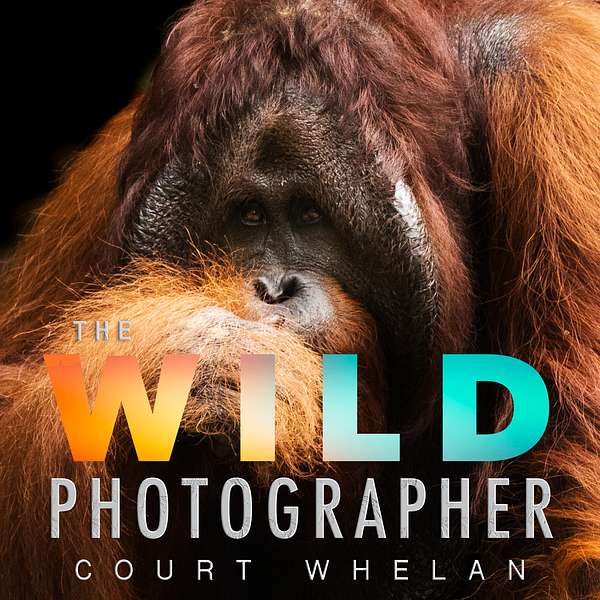
The Wild Photographer
Learn techniques, tips, and tricks for improving your wildlife, travel, landscape, and general nature photography with Court Whelan. Whether you consider yourself a beginner, serious hobbyist, or advanced professional, this is the way to rapidly understand and implement new skills to elevate your photography to new heights.
The Wild Photographer
My Most Popular Episode (Re-Release): How Pro Photographers Get Perfect Wildlife Portraits
Ever wonder what makes a professional wildlife portrait pop? In this fan-favorite episode, Court breaks down the secrets behind tack-sharp eyes, buttery-smooth backgrounds, and that magical “pro photo” look.
You’ll learn how aperture, telephoto compression, and background distance all work together to make your shots stand out.
From choosing your f-stop to post-processing blur and sharpening tricks, this episode is a masterclass in getting your wildlife portraits to wow.
Court's Websites
- Check out Court’s photo portfolio here: shop.courtwhelan.com
- Sign up for Court's photo, conservation and travel blog at www.courtwhelan.com
- Follow Court on YouTube (@courtwhelan) for more photography tips
- View Court's personal and recommended camera gear
Sponsors and Promo Codes:
- ArtStorefronts.com - Mention this podcast for free photo website design.
- BayPhoto.com - 25% your first order (code: TWP25)
- LensRentals.com - WildPhoto15 for 15% off
- ShimodaDesigns.com - Whelan10 for 10% off
- Arthelper.Ai - Mention this podcast for a 6 month free trial of Pro Version
Court Whelan | The Wild Pho... (00:01)
Hey friends, welcome back to The Wild Photographer. I am Court Whalen, your host, and I have just gotten back from an incredible trip in Africa, a photo safari to be exact in Kenya and Tanzania. And I'm really looking forward to telling you more about it on future episodes. However, for today, I'm gonna do something a little bit different. Let's be honest, I'm a little crunched for time and I've decided to re-release my all time most popular episode on The Wild Photographer, the way pro photographers get.
Perfect Wildlife Portraits. people are commenting and leaving me lots of reviews on it saying it's one of their favorites. So if you haven't listened to it, I think this is a great time to do so. It's from a few years back, the way pro photographers get perfect wildlife portraits. Here we go.
Court Whelan | The Wild Photographer (00:43)
When you see real professional wildlife photography, you probably notice there's something different about it. You may not be able to put your finger on exactly why. It may be a je ne sais quoi, there's just something about it that looks so dang good. My goal today is to do a deep dive into the way pro photographers get amazing wildlife portraits. So let's dissect, what is it that makes these pro photos look so good? Well, know, simply they're just amazing. It combines a lot of elements to give you that impression that you're like, wow.
This is a really good shot. Usually it comes down to two main things when it comes to portraiture of wildlife. Now we could go in a million different directions of macro versus landscape in wildlife, in landscape shots, but here we're talking about that portraiture shot. It usually comes down to a beautiful background blur in a tack sharp focus. So that's really the essence of it. An amazing tack sharp animal in a beautiful background blur, sometimes even a foreground blur. So how does that happen?
How can you achieve the same effect? Well, the first thing you need to think of is prioritizing your camera and your lens, your whole setup for a very shallow depth of field. What we're talking about when we say shallow depth of field, that has everything to do, well, most things to do with aperture. We'll talk about in a second how your telephoto range might actually impact that quite a bit. But basically, aperture is the name of the game, your f-stop, your f-number as I call it. And what we're looking at, and this is, stay with me here, the terminology is a little bit complicated, but we're looking
at very small f numbers, which correspond to big apertures, which corresponds to a shallow depth of field. So small f number is a big aperture, because it's a big opening to your lens and to your sensor, and it is a very shallow depth of field, very small slice of focus. So what numbers we're really looking at for that beautiful background blur is basically f4 and below. But we're looking at like f2.8, f3.5, f4.
you can get away with an f5.6 and a matter of fact, most of us have to get away with that. Even on my main wildlife lens, it's a 5.6, f5.6 at its full range at 400 millimeters. So you can get away with that and we'll talk about how to do that in a couple sections from here. But basically, when you wanna get the best portraiture is you wanna get the smallest f number, f2.8, f3.5, f4. If you can do that, if you have a lens that enables that, you are really ahead of the game.
So the next thing you're gonna do is when you're encountering this animal, you have your shallow depth of field or your small F number, you are gonna wanna focus on the animal, obviously, right? But the question becomes where do you focus? Because oftentimes when you fill the frame with an animal, as is very commonplace in wildlife portraiture, believe it or not, the whole animal's not in focus, even if it's just the animal's face. Pick some examples from online, you will notice that not every single thing is necessarily in focus, unless the photographer used.
flash maybe and that's just a not too commonplace thing. But what you're gonna do to overcome this, the fact that you have a really, it's a really difficult time to get everything in focus when you're shooting at those shallow depths of field like f2.8, like f4, maybe f5.6, is you're gonna prioritize focus, you've heard me say it before, focus on the eyes. ⁓ You don't have to get everything else in focus, but if you do not get the eyes in tack sharp focus, the photo is gonna look.
It's gonna look bad. It's gonna look wonky. Whatever you want to call it. It's not gonna look as good period So focus on the eyes sort of at the expense of everything else now the ideal thing is if you're shooting in the animal portraiture Let's say it's a fox or a polar bear and you're filling the frame with its face Maybe a little bit its neck a little bit its back You do want that whole face in focus. You want the nose in focus. You want the ears you want the forehead you want the mouth And sometimes that's possible and we'll talk about how to do that next
but sometimes you just can't get it all in focus, but if you don't get those eyes in focus, it's gonna look bad. Oftentimes, again, go back to some example photos and find when those eyes are intact sharp focus and other parts are not in focus, it's still a pretty darn good shot. Now, if you are really close to the animal and you need to start ramping up your depth of field to get more in focus, remember as we get bigger F numbers, ⁓ bigger depth of field or that smaller aperture, we're getting more in focus with the exact same shot. The problem is,
is that you sacrifice that beautifully blurred background, which is so essential to what I view as a pro photo look. So as a result, be careful getting bigger F numbers. One really great way, it's kind of a combination of ways to sort of hack all this where you can still get that really, really pleasing background, but also have a really tack sharp focus and make sure that most of the animals in focus is actually use more telephoto.
So by using more telephoto, you actually exaggerate the effect of this blur that a shallow depth of field has. So if you were to say, do some lens tests and shoot 200 millimeters at f2.8 and then 400 millimeters at f2.8, you're gonna notice that at 400 millimeters at f2.8, that background is way more blurred than at 200. And you can think of all the range in between at 300, at 100, at 50. The more telephoto, the more focal length,
bigger that number, 300 millimeters, 400 millimeters above, the same aperture is gonna give you actually a much bigger blur. So as a result, you can actually get a little bit further away from the animal and therefore use more telephoto. And then here's another trick, is if you actually create a little bit of space around the animal in your frame so that the animal takes up a smaller part of your shot, you are then able to get maximum blur in the background.
maximum sharpness of the animal because it's a smaller proportion of your frame. So an F2.8 or F4 will actually make that smaller part of your frame more in focus, bigger depth of field for that individual subject. And then you can crop all this after the fact to make it look as if you're a little bit closer. Usually when you have big telephotos, especially the big primes, you can actually crop in quite a bit. So that's a really, really great tactic. I'm just gonna repeat it here. What you can do is use your maximum extent of telephoto
Get a little bit further away from the animal, make the animal smaller in your frame, so don't fill the frame edge to edge, give yourself room to crop, and then take the shot. Shoot on the smallest f-number your lens will allow, and then plan on cropping to make it more of a big photo, to actually allow that animal's face to go edge to edge in composition. It's a really, really great tactic, and I highly recommend it. So the last thing we're gonna talk about is what to do after you've taken the shot.
In post-processing, sharpness and blur is something that we have really, really easy access to these days. And although I am a bit of a purist when it comes to post-processing and I don't like to do a lot of stitching and fixing and cloning, I will lighten and darken, I will mess with contrast, and I will mess with sharpness and blur. Particularly when I have a background that isn't quite blurred enough, I will actually, ⁓ by means of going to the sharpness slider, I'll go to the exact opposite end of sharpness, like a negative sharpness,
which creates that blur. Now in some photo editing programs, you can actually add blur to it. ⁓ Sometimes that's done by noise reduction. Sometimes there's actually a blur slider. But the idea is you can actually, with a few different sliders, make maximum blur. And just use that paint brush tool and paint that blur in the background. In the new version of Lightroom and Adobe Camera Raw, there's a really, really easy subject selection tool. When you do have portraiture, this goes for wildlife, people, anything.
it's really easy for photo editing programs to select the background or the subject because there is that sharp difference. You have a sharp subject, you have a blurred background. It's really, really easy for computer programs to figure out where that literal line is and only select the background. So what that allows you to do, again, in this new, I think it's the 2021 or 2020 Lightroom, you can use that tool, select only the background, and then just go wild with the blur sliders, the D sharpness slider.
and really, really blur out that background. It makes for a very pleasing effect. Now similarly, you can do the exact opposite to help boost that sharpness blur contrast, not traditional contrast, but the contrast between sharpness and blur. You can look at the animal, particularly its face, even more particularly, the eyes, and just give a touch of sharpness there. Now sharpness, it's getting better like everything else is in post-processing and Photoshop and Lightroom, but still, you can botch it, you can ruin the photo, you can make it look too fake.
Be careful with sharpness because it's not actually doing what sharpness does in the camera with aperture. It's doing so in a very digital way. It has to do with creating a very small border of definition around each pixel. So if you go overboard, it's pretty easy to ruin the photo. So what I usually like to do is do very, very minimal sharpness. But for all my great wildlife portraits, I do give it a little bit of treatment of sharpness. And usually it starts with the eyes.
and maybe a little bit of like the forehead or the ears or anything that just want to exaggerate. Now, here's a key, key thing here. I am not sharpening parts of the scene that aren't sharp to begin with. I'm not correcting anything with a sharpness slider. And it's the same thing with the blur, actually. I'm not trying to correct and blur things that were already sharp. You're never gonna get the effect. And if you do, it's actually gonna look really fake. I'm only using the sharpness to further sharpen something that's tack sharp in camera.
But again, what we like so much about wildlife portraiture and what pro photographers do is they harness that sharpness blur contrast. The fact that the background is blurred makes the subject even sharper because you're seeing a blurred background. The fact that the animal is so sharp, you're seeing an extra blurred background because of that visual contrast. So by boosting both, you're just creating a difference in field basically. So a little bit sharper and a little more blurred and it's going to
pop that much more and get a really, really, really nice pro look. That is key. One other tip to really maximize blur in the background is to figure out and really think, very cognizant of your placement in relation to the wildlife and the wildlife's placement in relation to the background. Now this is an extra hard thing to explain over a podcast, but bear with me here. We have three elements in the photo. You're the photographer.
We have the subject, which is the animal, it's the wildlife, and we have the background. So we have A, B, and C. A is you, the photographer, B is the wildlife, and C is the background. Okay, now if A and B are close, and B and C are distant, meaning you are closer to the wildlife than the wildlife is to its background, the background's always gonna be somewhat blurred, and this is actually a really, really nice thing. So I particularly choose scenes.
and actually choose my background, I will orient myself, especially in a forest, if there's a lot of different pockets of vegetation and trees where I can make the background further, I will do that. So for instance, if there's a standard tree is directly behind the animal and it's 10 feet behind the animal. But if I moved in my left, that standard trees kind of pivots as I pivot. And then the next standard trees now behind the animal is 20 or 30 feet away. That's gonna be a better pro photo. That's gonna have more background blur.
Now let's think of the exact opposite. What if the distance from you to the animal is pretty significant, let's say 100 feet, and then the animal to the background is 10 feet. So if you think about it, this is like a classic example of an animal sitting in a tree and you're far away. It is almost impossible to blur the background when you're that far from the animal and the animal is pretty close to its closest background.
That's a really, really tricky scenario. And that's why wildlife in trees is just one of the hardest things to photograph. Don't beat yourself up. It's a really, really challenging scenario. So I always will try to prioritize getting closer to the wildlife and getting the wildlife further away from its background. The truth is, is this is not always possible. It's a wish list item, but it's not always possible. You have a lemur sitting up in a tree. What are you gonna do? Try to scare it or coax it away? Absolutely not. You are...
you are stuck with what that scenario is. But the point is, the most helpful thing is that when you are presented with a situation where you are closer to the animal than the animal is to its background, I'll repeat that, when you are closer to the animal than the animal is to its background, you've got a really great setup for a beautiful blurred pro photo. So yeah, maybe it's not the perfect wildlife pose, maybe it's a different species that you're a little bit less excited about, but nevertheless, it's gonna be a better pro.
photograph because of that relativity because of the relationship between you to the animal and the animal to the background so it's about developing that that vision that sense of ⁓ sort of a keen eye to know when the photographic opportunities are gonna be best and maybe you have to wait it out maybe you have to wait for that other animal to come by or wait for that animal to get in a position where the background is further away because that is always gonna give you a better shot and that's regardless of whether you have the
best lens with the shallowest depth of field, F2.8 glass, using all your telephoto, all these tricks, focusing on the eyes. If you can make that ratio, those distances, in your favor, you're gonna have a much, much, much better photo. Highly recommend it. So, kind of bring it all together. Remember, the best photos are ones that use all of these tactics. The core thing we're trying to get here is that juxtaposition, that sort of...
Contrast not light and dark contrast but contrast between sharpness and blur the best way to start by doing so is dialing your camera in on the smallest f number f4 f2.8 if you got it at 5.6 will work but not f8 ⁓ not f11 really anything over at 5.6 and you've got a lot of difficulty the next thing is make sure the thing that you want to focus on is in really good focus focus on the eyes at the expense of anything else
Yes, with all these other tricks that I'm about to tell you, you can get a little bit more depth of field, but focusing on the eyes is paramount. Now, in order to get a little more depth of field of an animal when you are using your big telephoto lens, actually try to get a little bit further away from it. Put the animal in a smaller portion of the frame. Remember, depth of field is relative in itself to how much that animal takes up or how much that subject, just the thing you're photographing, takes up of the frame. If it's edge to edge composition,
that might as well be a big landscape scene and you're shooting at f8 or f11 to get all the elements in focus. So if you're photographing a monkey's face and it's edge to edge, you need to shoot on f8 or f11 to get that all in focus, but that's not gonna happen when you're doing wildlife portraiture. And usually, you're not gonna have that happen because of a number of factors, and especially the fact that you do want that background, you do want that blur. So I always advocate for making the animal a smaller part of the frame.
knowing that you're probably gonna crop in in post-processing. You're gonna crop in a little bit, but remember, having the animal smaller in the frame makes the animal sharper, a bigger depth of field because it is that proportion smaller, and then having that big telephoto is gonna make the background more blurred, and then if you can choose your background, if you can move to create more space between the animal and its background, and a little bit less space between you and the animal, that's just gonna bring it all together and make it really, really pop.
So guys, there you have it, some tips and tricks for how pro photographers get amazing wildlife portraits. I hope you enjoyed and looking forward to seeing you next time.
